The degree of automatic paint’s protection against environmental forces depends on its fineness. The process of painting a car entails paint restoration of the car’s body involving steps: cleaning, priming, and preparing the vehicle for painting. It also includes painting the vehicle’s frame, doors, hood, and other features, such as grinding and polishing the vehicle frame. Proper guidance and appropriate actions are required for automotive paint to determine the quality of the paint job. Following the techniques by the experts of autobody shop Winnipeg is crucial if you want to achieve a favorable and excellent outcome. A wide variety of paints and varnishes are available, and they should be used properly to allow maintenance of the bodywork for many years.
Painting a car is a difficult process, whether you’re trying to have it redone or need to sand down your vehicle to remove rust and air bubbles in the paint. A poor painting job may stand out like a sore thumb. For all your car painting needs, contact professional services for automotive paint, or follow these instructions to paint your car on your own:
Getting a Car Ready For Paint:
It will be easier for you to complete the task if all of your resources are prepared in advance. The quantity of paint needed will vary depending on the area. Maintaining a spotless, clutter-free workplace will help you avoid imperfections.
Pick your location Carefully: Before you begin any actual painting, you’ll need to find a location that is appropriate for your DIY project. Make sure the area is well-lit, well-ventilated, and offers plenty of space for moving about your automobile. Pick a location with minimal dirt and access to electricity. Refrain from entering residential garages as these frequently contain furnaces or warmers that offer a fire risk when in touch with paint fumes.
Eliminate trim, dings, and rust: Make sure your painting procedure does not draw attention to any flaws; fix any visible dents and remove any chrome or plastic trim. Following completion of the painting, moldings and trim can be changed. Check for rust areas on the car. While badly rusted parts need to be handled and sealed to stop rust from spreading, light rust areas can be sanded before painting.
Identify the type of paint: Choose from the paints specifically made for autos, waterborne or solvent borne. When painting your car, you must not use any other kind of paint.
Sanding:
Sanding is a crucial step because it removes layers and creates a solid surface for the fresh paint to adhere to. Give your paint a smooth, easy surface to attach to by sanding the entire car in circular motions, all the way down to the original primer or, at the very least, far enough for your new layer of paint to stick to. If you’re short on time, the third option will do; however, you might obtain better results by sanding everything down to the bare metal.
After you’ve completed sanding, ensure sure your automobile is thoroughly cleaned and the dust is taken off. To remove any oil residue and prepare your car for painting, thoroughly wipe down all of its surfaces with a rag and denatured alcohol or mineral spirits.
Tape Surfaces: Cover the areas of your car that you don’t want painted, such as the mirrors, window trim, glass, grills, and door handles, with masking tape and newspaper.
Priming:
If you’ve sanded your car down to the bare metal, you need use a corrosion-resistant, self-etching primer to raise the surface of your car. If you removed any rust, make sure to prime the areas thoroughly by feathering them until they are clean and using enough primer. In accordance with the instructions given on the field, permit complete curing of all primer. Sand the freshly primed surfaces once again, being careful not to expose the steel floor again by sanding them too much. With a rag that has been lightly wet with thinner, wipe the primed surfaces.
Make sure to put on a face mask and goggles before priming your car to prevent contact. This phase enables the car’s bodywork and seal. It ensures that the paint will have a spotless surface to adhere to. Additionally, priming helps to minimize color variations while painting. Each application of primer must completely dry in between.
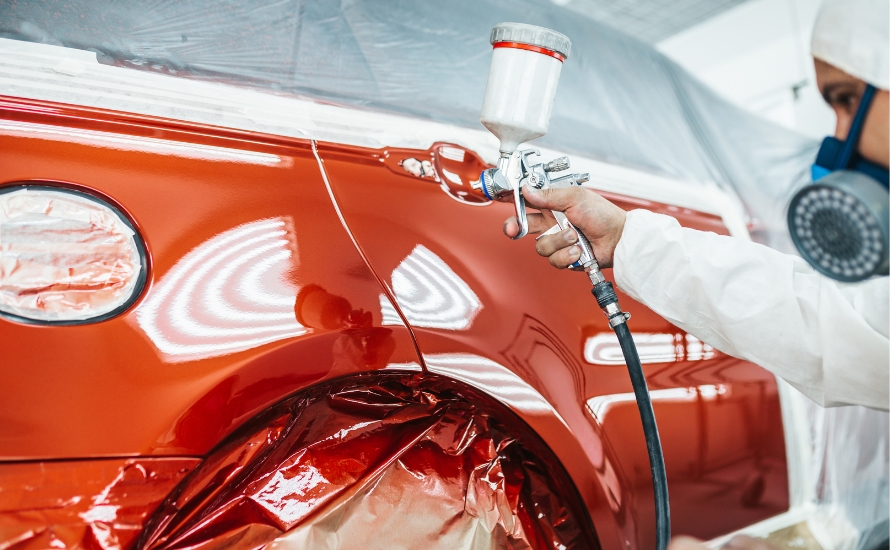
Painting:
When you’re ready to paint, be sure to follow the manufacturer’s instructions and get the paint ready for spraying. Apply paint in thin or even coatings while holding your spray gun about 6 inches away from the floor of your automobile and sweeping from side to side. It usually takes three to four applications to completely cover the surface. Follow the manufacturer’s recommended drying time, which might range from 20 minutes to an hour.
Sand the surfaces once more to get rid of any powdery residue before practicing your final layer, and then wipe with a fresh rag. Practice applying a clean coat of lacquer while using the same portrayal technique.
While the clear coat is still wet, remove the covering tape, and then allow the clear coat to dry in accordance with your producer. Finish up your painting project by polishing all painted surfaces in circular motions. What’s more, you can get a sleek finish by using a rubbing compound.
DIY Painting:
DIY painting requires meticulous work, but we’ll try to explain how to do it.
- Blend the paint to the desired consistency by diluting it with solvent. Filter the paint through a sieve or piece of gauze; warm the paint to between 40 and 50 degrees to make the painting procedure less difficult. In addition to saving, you money on solvent, such a process could result in 2 to 3 paint layers.
- The last paint coats must have a particularly fluid consistency. Depending on the temperature within the building, allow the paint to dry while taking breaks every 15-20 minutes. You must sand the surface after applying each coat of primer, putty, or paint when painting the automobile body and your own arms. When grinding, water is carefully applied to the handled area while using waterproof skins. Use slumbering sanding paste for grinding.
Polishing:
The final step in painting a car is polishing. The sprucing procedure is carried out by rotating the object while applying a unique sprucing paste.
Car painting Job Cost:
You can save a ton of money if you decide to paint your vehicle by yourself. For $100, you can get the supplies needed to paint a portion of your car. A single coat of synthetic enamel paint typically costs between $500 and $650. A car’s paint job, including prep work and the use of premium paint, typically costs between $1300 and $1500. However, if you are not confident to do car painting by yourself, you can hire services for automotive paint in Winnipeg. No matter what brand or model your car is, their skilled crew can paint it perfectly.
Final Words:
Professional Autobody shop use high quality automotive body repair parts to help you recover your vehicle damage. After painting your car, you must now protect the paint from damage to preserve the exterior beauty of your car. In order to prevent the paint on your car from cracking, try to park it in an area that is colored. Second, wash your car frequently to remove debris and dust that could harm the paint job. Additionally, applying layers of wax to the exterior of the car keeps the paint intact and prevents it from flaking.