
Window moulding is a process of making a custom window coverings by shaping the outside of the window with a form. It can be done for both residential and commercial applications. There are different types of moulding, and each has its own advantages and disadvantages. In this article, we will discuss the different types of window moulding, their benefits, and how you can choose the right one for your project.
What is window moulding?
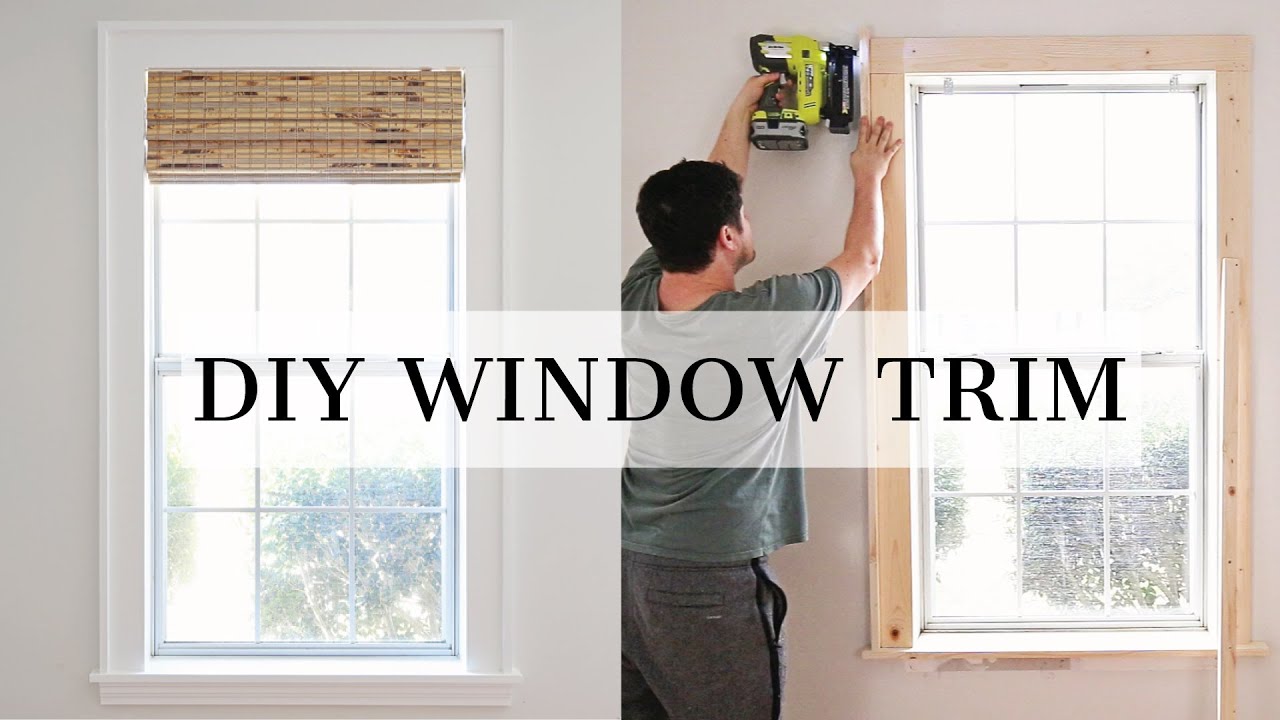
Window moulding is a popular way to add detail and style to your home windows. It’s an easy project that can be completed in a few hours, and it won’t require any special tools or expertise.
First, you’ll need some supplies: a saw, clamps, sandpaper, wood glue, wood screws, and window moulding. You can find pre-cut moulding window at most home improvement stores or online retailers, but if you want to create your own design, you’ll need to cut the pieces yourself.
To begin the project, clamp one end of the moulding to a work surface using the clamps. Saw along the length of the molding, making sure to keep the angle consistent from end to end. Once you’ve cut all of the pieces, remove them from the clamps and sand them down until they’re smooth.
Next, mix together a small amount of wood glue and enough water to make a slurry. Brush this mixture over one side of each piece of moulding. Make sure to get it into all the nooks and crannies. Let the glue dry for about 20 minutes before screwing the pieces together using the screws.
Once everything is assembled, test out your window moulding by placing some items inside it – like plants or candles – and seeing how they look reflected in the glass. If everything looks good from outside (and there shouldn’t be any obvious gaps or holes), then you’re
Types of moulding
Moulding is a great way to add detail, dimension and character to your projects. There are many different types of moulding that can be used for different projects. This article will discuss the different types of moulding, their uses and how to make them.
There are three main types of moulding: traditional wood moulding, plastic moulding and metal moulding.
Traditional wood molding is made from pieces of wood that are shaped and then glued together. It can be used for details such as crowns, cornices and baseboards.
Plastic molding is made from plastic sheets that are cut into desired shapes and then glued together. It is popular because it is lightweight and can be reused many times.
Metal molding is the most popular type of molding because it is durable, has a high gloss finish and can be painted or stained to match any project. Metal also comes in a variety of colors and styles to fit any project.
Materials needed for window moulding:
-Moulding plaster
-Paint or a sealant
-Cordless drill with bits appropriate to your project
-1 inch hole saw bit
-Circular saw with a carbide blade
-Paint or sealant of your choice
-Ruler or square
-Window trim or pieces of wood that are at least the same width as the moulding you are using (or a little wider)
-Latch hardware (if using)
How to make your own window moulding
To make your own window moulding, start by cutting the pieces of wood you need. You’ll need a piece of 1×4 inch wood for the base, a piece of 1×6 inch wood for the middle, and a piece of 1×8 inch wood for the top. Then, cut out the shape of your window moulding with a jigsaw or saw. Make sure to measure and mark all your cuts before making them! Once you have your pieces cut out, it’s time to start glueing them together magento development chicago. Use construction adhesive to attach the 1×4 inch base to the bottom of the 1×6 inch middle piece, then attach the 1×8 inch top piece to the bottom of the middle piece. Make sure to line up all your cuts perfectly before gluing! Next, grab your drill and screw in screws at both ends of each board so that they’re secure. Now you’re ready to start sanding down your newly-made moulding! Begin by using a belt sander with a medium-sized grit sandpaper. Work your way up until everything is smooth and there are no gaps between the boards. Finally, use a hand sandpaper to polish everything off until it’s shiny! You’re done! Now you can put your new window moulding into place and enjoy its aesthetics!
Conclusion
If you’re looking to add a bit of extra style to your home, and don’t mind a little DIY, consider moulding your own window moulding office power. This is an inexpensive way to update your windows and give them a look that’s all your own. Not only will you be able to personalize your windows with new moulding, but you’ll also be helping to reduce energy consumption in your home. So why not give it a try?